
When is National Sourdough Bread Day?
The National Sourdough Bread Day is on 1 April every year to commemorate one of the most ancient leavened loaves of bread. To make the bread, one has to go through a process of long fermentation of the dough using yeasts and lactobacilli.
When you use naturally occurring yeasts and friendly bacteria instead of cultivated yeast, the bread has a somewhat sour yet pleasant taste. Read on to find out more about the National Sourdough Bread Day.
The Origins of National Sourdough Bread Day
Reports suggest that sourdough has its origins in Ancient Egypt at around 1500 BC. Many believe this is the time bakers accessed the first form of leavening. This form of leavening remained the standard form of leavening during the European Middle Ages.
Besides that, sourdough was also the primary bread in the California Gold Rush. It is also still a part of the San Francisco culture today. The bread was very trendy when they nicknamed the gold prospectors “sourdough.”
In Yukon and Alaska, they refer to someone who has spent the whole winter north of the Arctic Circle as a “sourdough.” It refers to their custom of keeping their sourdough close to their bodies during the coldest months to protect it.
The Alaska and Western Canadian territories also practiced the sourdough tradition during the Klondike Gold Rush. However, the San Francisco sourdough is the most popular sourdough bread made in the US today.
The sourdough produced in San Francisco is different from the production in other areas. This is because the San Francisco variety has remained in production since 1849. Some bakeries can trace their founders back to California’s Gold Rush period.
Moreover, many restaurant chains have sourdough bread as a menu staple. You can use the sourdough bread as a side to your soup or stew. Besides that, you can also toast it with your morning cereal.
How to Observe National Sourdough Bread Day
If you want to be part of this age-old tradition, there are several ways you can celebrate it. Here are some excellent tips:
- Bake a homemade sourdough bread and enjoy it with your family and friends. If you don’t know how to do that, don’t panic! You will find a straightforward sourdough recipe you can try at home.
- Share a recipe or order some sourdough bread from your preferred bakery. Fortunately, there are many sourdough recipes as many people have embraced the tradition. On the other hand, you can easily find a baker baking sourdough bread in your area.
- In this era where social media is a big deal, you can share the #SourdoughBreadDay hashtag on your social media platforms and help to make it a trend.
An Italian Sourdough Bread Recipe
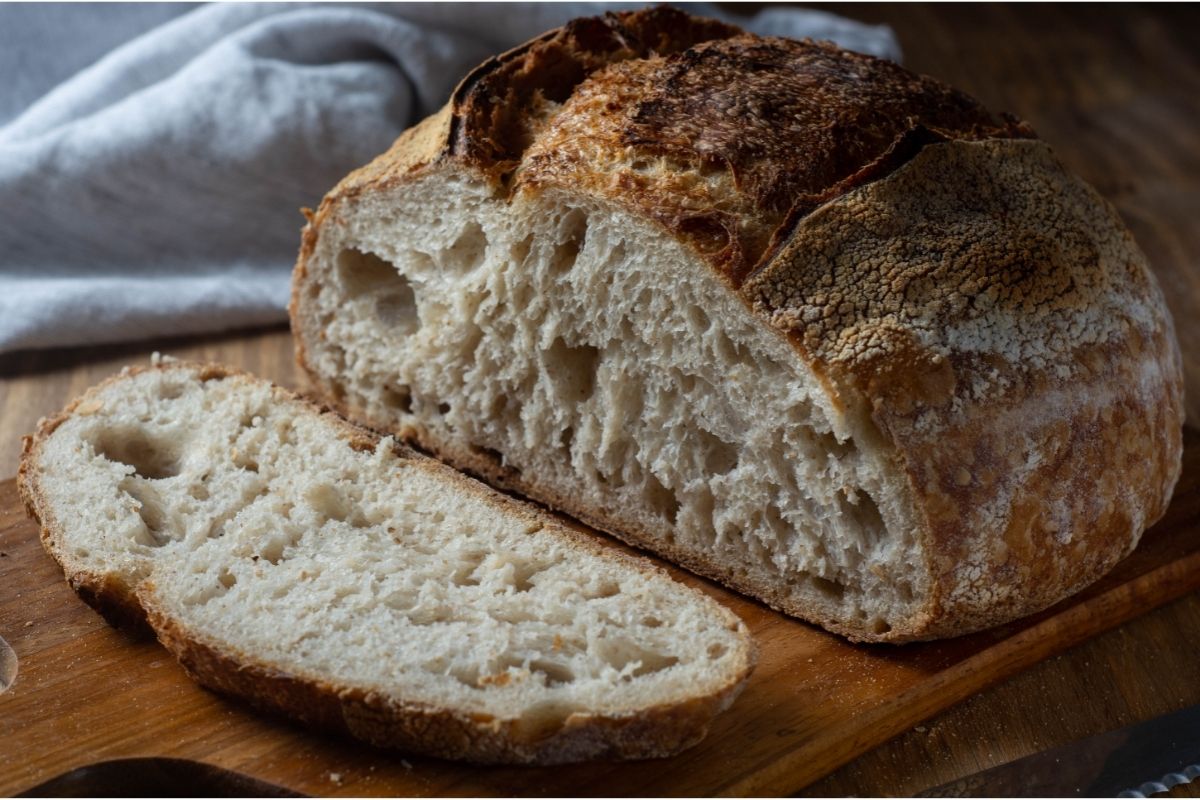
Instead of jumping straight to the recipe, let’s whet your appetite by helping you understand what this bread is. The Italian sourdough bread comes with a chunky, crunchy crust that is not very tough.
Its crumb is also tightly woven because of the durum in the mix. Consequently, the bread is more closed than a country loaf. Moreover, the closed and tender crumb is because of the durum’s inability to trap many gases during fermentation.
Durum is not always used in Italian bread making. However, this recipe includes it because of its ties and significance to Italian cuisine. Italians use durum wheat to make dried and fresh pasta. You can also use it to make bread as long as you mill it finely.
When you use it for baking bread, it gives the crumb a unique, rich color and an unmatched flavor reminiscent of fresh pizza. So, when sourcing the durum flour to bake this delicious bread, ensure you use finely milled durum. The finely milled durum flour has “extra fancy durum flour” on its label.
Additionally, you will leaven this Italian Sourdough Bread naturally. Therefore, you must ensure you have a strong sourdough starter bubbling away on your kitchen counter before starting the process.
Here is the recipe:
Active prep time: 1 hour
Inactive prep time: 23 hours
Cook time: 50 minutes
Makes: 2 loaves
Ingredients
Levain
- 1.59 Ounce (45 grams) of all-purpose flour
- 1.59 Ounce (45 grams) of whole wheat flour
- 1.59 Ounce (45 grams) of water
- 1.59 Ounce (45 grams) ripe sourdough starter
Bread Dough
- 13.79 Ounces (391 grams) of all-purpose flour
- 11.92 Ounces (338 grams) durum wheat flour (extra fancy)
- 5.29 Ounces (150 grams) of whole wheat flour
- 0.26 Ounce (725 grams) of water
- 0.60 Ounce (17 grams) of sea salt
- 6.28 Ounces (178 grams) ripe levain
Ice, to generate steam during baking
Directions
- Make a Levain (9:00 am)
Begin the preparation at 9:00 am. At this time, your sourdough starter is ripe. Use a medium bowl to mix all the levain ingredients.
This levain will be dry because it has only 50% water to total flour. Knead and mix the ingredients using your hands until the mixture is smooth.
Put the smooth mixture in a jar with a loose-fitting lid at room temperature to ripen. This may take around five hours.
- Autolyse the dough (noon)
As your levain ripens, start the dough. Put the all-purpose flour, durum flour, whole wheat flour, and 23.81 Ounces (675 grams) of water in a sizeable mixing bowl. Hold back 1.76 Ounces (50 grams) of water until mixing.
Ensure your hands are damp then, mix everything, and cover with an airtight reusable cover. Allow the dough to rest in a warm place for two hours.
- Mix the Dough
Remove the cover on the sizeable mixing bowl and add the ripe levain. Sprinkle the 0.60 Ounces (17 grams) of salt and dispense the 0.88 Ounces (25 grams) of the remaining 1.76 Ounces (50 grams) of water into the dough. Wet your hands and pinch the water and salt through the dough.
After that, fold the dough over itself repeatedly until the mixture is consistent. If you feel the dough is not excessively wet or soupy, pour in the remaining water and keep folding the dough over itself until it comes back together.
Fold for another minute until the dough is more elastic and smoother. Transfer your smooth dough to another sizeable bowl or container for bulk fermentation.
- Bulk Ferment the Dough (2:30 pm to 5:30 pm)
Cover the dough using a reusable airtight cover. Allow it to rise at warm room temperature (76 degrees Fahrenheit/ 24 degrees Celsius) for up to three hours. During that time, give the dough three sets of “stretches and folds.” This will provide it with additional strength.
Do the first set after 15 minutes and the following sets at 30-minute intervals. Set your timer for 15 minutes and let the dough settle, covered. After 15 minutes, give the dough the first set of folds and stretches.
Here is how to stretch and fold:
- Wet your hands slightly (do this for the subsequent stretch and fold)
- Grab the dough by the north side (the side farthest away from you) in the container for each set; stretch the dough up and over to the south side (the side nearest to you).
- After that, keep doing the same folds east to west and west to east. You will end up with a folded-up square in the container.
- Allow the dough to rest covered at room temperature for 30 minutes.
- Repeat this process two more times at 30-minute intervals. Perform three sets.
- After the third set, allow the dough to rest, covered, for the remaining 90 minutes of bulk fermentation.
- Pre-Shape the Dough (5:30 pm)
Your dough should have risen in the bulk fermentation container three hours later. The dough should also be smoothed out, but it might have a few bubbles on the top and the sides.
Use a bowl scraper or flexible bench scraper to gently scrape the dough and put it on a clean, unfloured surface.
Use the bench scraper to divide the dough in half. After that, use the bench scraper and your other hand to pre-shape each piece into loose rounds. You can either flour or wet your other hand with water.
Put the rounds to your work surface’s side and allow them to rest uncovered and at room temperature for about 30 minutes.
- Shape the Dough (6:10 pm)
Once the 30 minutes is up, lightly flour your work surface and on top of one of the dough round.
Use a floured hand and bench scraper to flip over one of the rested rounds and put it on the floured work surface. Shape it into a long oval or round shape as per your preference.
If you choose to shape it like an oval, fold the dough’s left and right sides toward the center, making one long rectangle. After that, fold the dough’s top quarter farthest from you down and tenderly press to seal the small fold.
Keep rolling down the dough from top to bottom of the dough nearest to your body. You will end up with a tube having the seam-side down on the working surface. Squeeze the ends closed or lightly roll the edges with each hand forming a taper.
Move the shaped dough with the seam-side up to a 10-inch proofing basket. Repeat the process for the other piece of dough.
After that, shape round loaves by folding the bottom of the rested round-up and pressing gently to seal. Next, fold over the right side of the round to the middle and then fold over the left side to the middle. Then, fold the top down to the center, and you will end up with a letter shape before you.
Turn over the dough so that the seams are down on the working surface. Lastly, use your hands to pull the dough toward your body as your fingers generate tension between the dough and the working surface.
If the dough needs more tension, push it around away from you as you turn it slightly before dragging it toward your body again. Keep pushing and pulling as necessary to generate even tension and a round shape.
- Proof the Shaped Dough (6:30 pm to 9:00 am, overnight)
You can proof the dough at room temperature for 1 ½ to 2 hours. Alternatively, you can place it in the refrigerator to retard (proof at cold temperature) all night.
Please treat this as a two-day recipe to allow you to proof it overnight in your refrigerator. Cover each basket using a reusable bag and put the baskets in the fridge all night.
- Bake the Loaves
Preheat the oven to 450 degrees Fahrenheit (230 degrees Celsius).
Put an oven rack in the bottom third with a pizza stone. Alternatively, you can use baking steel on top and a roasting pan at the bottom. Throw a cup of ice into the preheated roasting pan when you slide in the dough. This will help generate steam in the oven.
Put a large piece of parchment paper on a pizza peel or sizeable cutting board. Tenderly tip one dough out to the left and one to the right. Allow four to six inches between them (10.16 to 15.24 centimeters) to give them room to rise in the oven.
Use a baker’s razor or sharp serrated knife to score the top of the dough with one vertical cut. Alternatively, you can make two smaller vertical cuts starting at the top of the dough, moving downward. Then, overlap around 20%.
After that, carefully drag out the oven rack and slide the parchment paper with loaves onto the baking surface. Lastly, watchfully pour a cup of ice cubes into the preheated roasting pan and swiftly close the oven door.
Bake for 20 minutes and remove the pan you used for steaming. Keep baking for another 30 to 35 minutes until your loaves are deeply golden and the internal temperature is about 206 degrees Fahrenheit (96 degrees Celsius).
Remove your well-baked loaves from the oven, and voila, you have your Italian Sourdough Bread! Allow cooling on a wire rack. Wait for a minimum of two hours before slicing.
Your Bread; Your Way!
There you have it! The next time you celebrate National Sourdough Bread Day, you will not be just a spectator. This comprehensive guide has given you tips on how to celebrate this day.
It has also given you a one-of-a-kind Italian Sourdough Bread recipe you can try at home. The ingredients are readily available at your local market. By the way, you can adjust the recipe to add your personal touch for better results. Your Bread; Your Way!
Community of passionate writers and content creators who share a love for Italian heritage, culture, travel, food, and the Italian-American community. Our mission is to celebrate Italy’s rich history and traditions and connect with others who share the same passion.
